-
Preparation
Start by configuring your transfer to the recommended settings according to the product you have chosen. Then adjust the pressure on the machine based on the size of the sub-plate being used. We recommend a pressure of 2–3 bar for a small sub-plate and 5–6 bar for a large sub-plate on the transfer press.
-
Preheating garments
Make sure your garment is lying straight and flat, and that there are no pockets or buttons in the way of or on the area you are applying the transfer to. The entire surface touching the base plate must be lying smooth to ensure a good result.
We recommend preheating the garment for at least 5 seconds before the transfer print is applied. Preheating makes the garment shrink, giving you a nice flat area that the print can stick to properly.
-
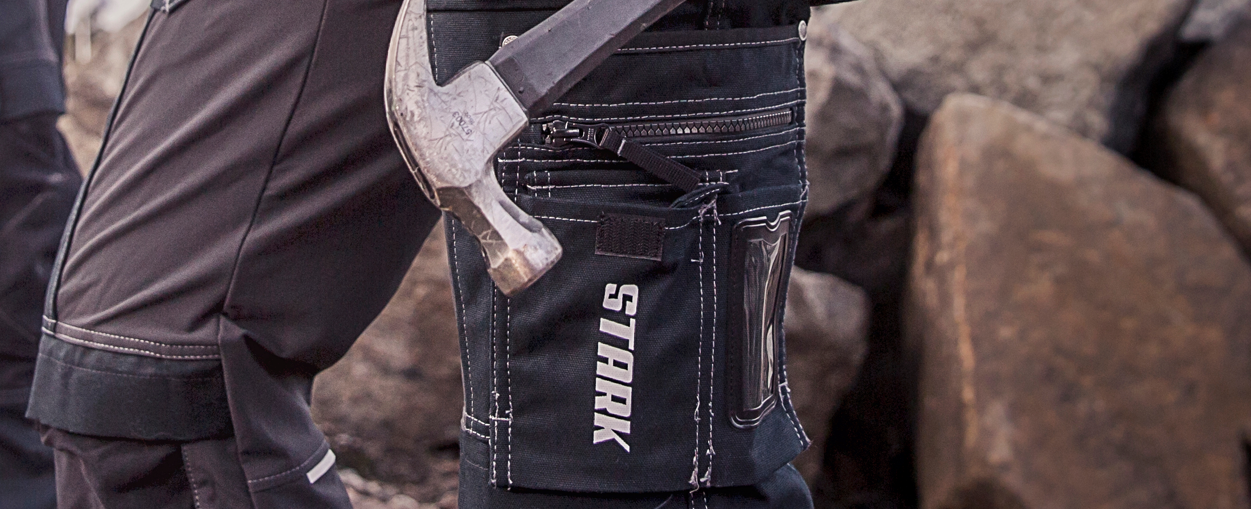
Raising the area with a rubber pad
To achieve a good application close to a zip, we recommend “raising” the area using rubber pads (see articles 3014, 3012, 3011 & 3003).
You can do this by quite simply placing the rubber pads under the flat area next to the seam so that the fabric you want to print on is raised up above the surrounding seam, giving you a properly flat area for the application.
-
Applying your heat transfer
Place your transfer on the flat area and begin applying. Since the area has been raised using a rubber pad, we recommend adjusting the pressure depending on what size rubber pad you have. If you are using a small rubber pad, you may need to lower the pressure on your heat press to less than 2 bar.
Our heat presses automatically end the application when the set time ends.
ATTENTION! On heat presses not manufactured by us, you may need to end the application manually.
-
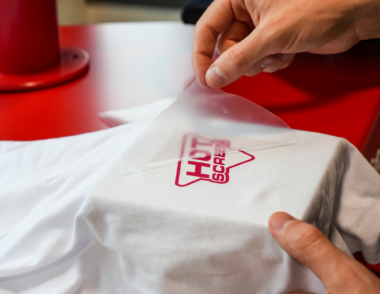
Remove the carrier
Once the transfer is complete, remove the carrier. When using STARK & FLEX Heat Transfer, the transfer paper can be removed while it’s still warm. When using REFLEX Heat Transfer, the plastic carrier should only be removed once it’s cold.
-
Check your heat transfer
Once you have finished applying your transfer, we always recommend running your hand over the transfer to ensure that the adhesive has melted correctly. You will easily be able to tell if the adhesive has not melted correctly. If this happens, place a piece of protective paper (art: 3016) on top with the matte side facing down and run the heating iron over it for 10 seconds. Then immediately remove the protective paper and your application is complete.
 English
 Svenska
 Deutsch
 Suomi
Suomi